With the release of the version 1.3 of Diaphanie, we have updated the advanced options for Halation and Diffusion settings. Even though our products have only recently been released, we are constantly looking for ways to optimize certain behaviors, and this is also an opportunity for us to explain a little more about how these tools work.
The general concept
The generation of diffusion or halation in post-production is based on the same mathematical principles. In both cases, the aim is to create a blurred image from the linearized original image, then add this blurred image to the original image according to specific methods.
Working with linear data
Why use a linearized image ? Because in linear values, the scale of magnitudes is the same as the photometric scale, i.e., the scale of luminous phenomena. Since diffusion and halation are both light phenomena, working with a linearized image makes sense (it’s easy to forget that halation is a light phenomenon too: since it occurs inside the film itself, it’s easily mistaken for a sensitometric phenomenon but in reality, it is an effect generated by stray light that is quite comparable to diffusion).
Once we’re working with linear data, we can perform mathematical operations that are comparable to the phenomena we want to reproduce. The color managed spaces in which our tools work (ACES, RCM, etc.) are convenient in that, when properly characterized, any signal can be linearized.
Understand the behaviors to mimic them
Optical diffusion is produced by micro-lenses or fine particles dispersed in the filter mass, which produce a blurred image (with visual characteristics that depend on the type of diffusion used). This blurred image combines with the sharp image obtained from the rays that did not encounter any particles or micro-lenses as they passed through the glass.
Halation occurs when light coming in the camera is intense enough to pass through the entire film, reflect off the camera’s back pressure plate and pass through the film layers again. This primarily contaminates the red layer – the last layer, closest to the pressure plate – but can also affect the blue layer, depending on the light’s intensity. Like diffusion, halation creates a blurred, low-intensity image superimposed on the image, mainly around the highlights.
We are therefore able to break down these phenomena and perform equivalent mathematical operations directly on the same photometric scale.
So why is this not enough to systematically generate satisfying diffusion or halation in all cases, and why do we need to add advanced options involving relatively complex mathematics?
About Dynamic Range
The answer lies in the information we use as a starting point to generate these phenomena: the recorded image. If all the energy differences are accurately captured, the model described above works perfectly. But in many cases, some of this information is missing because parts of the signal are clipped – for example, in bright light sources or specular reflections. This is not a problem for the image itself, since these areas would be represented white anyway, but since we are seeking to propagate their effective energy to adjacent areas, we need all of the energy differences. We are still a long way off, even with today’s wider dynamic range cameras. We would probably need around 20 EV of dynamic range to cover most cases, which would require 5 additional EV on top of what the Alexa 35 provides, for example.
And this has nothing to do with digital cameras having less dynamic range than film (which is no longer the case today). As explained above, halation is a phenomenon of stray light, so even when a light source saturates the capacity of the film in its center, its stray light in adjacent areas, via light bounce on the back pressure plate, can still record modulations.
In the same way that the modulation of a light source, even when clipped, causes variations in a diffusion filter, because the light contamination can still be recorded.
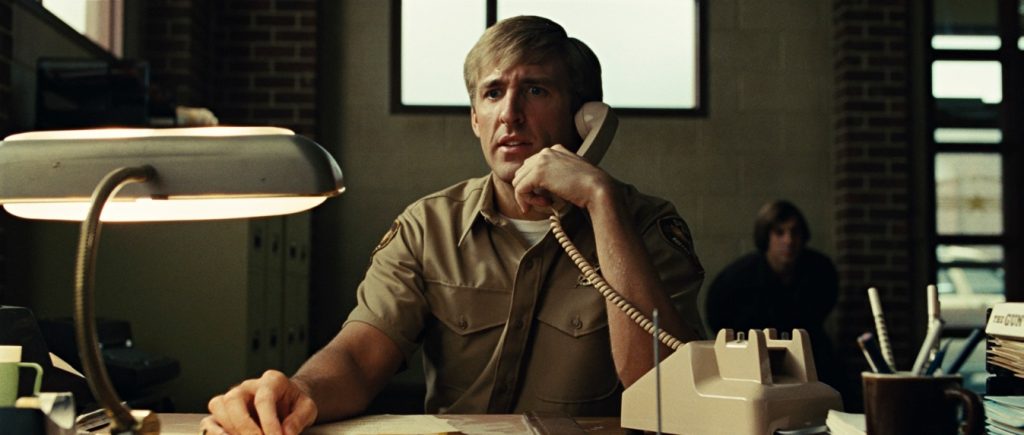
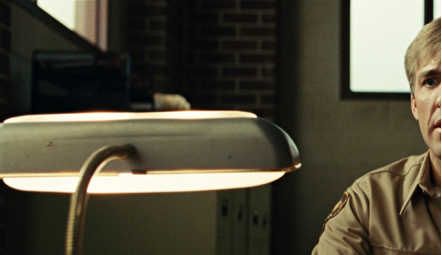
In the example above, from No Country for Old Men (shot on 35mm film), we can clearly see the halation modulations in the glass of the lamp that materializes the position of the bulbs. This same effect would be difficult to achieve in digital capture because the frosted glass of the lamp would probably be clipped, meaning that the recorded digital value would be identical across a large portion of the frosted glass. Without digital modulation, it would be impossible to reproduce this modulation in the digitally-generated halation.
How will this translate to digital images, and what is the solution?
In digital images, this means that in each clipped area, the lack of information prevents us from translating the true photometric differences into the phenomena we generate.
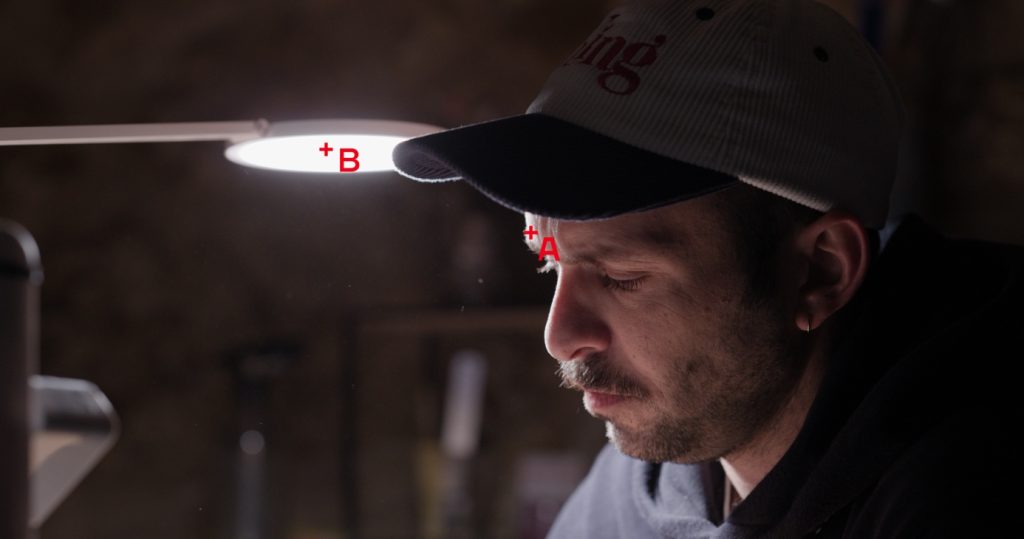
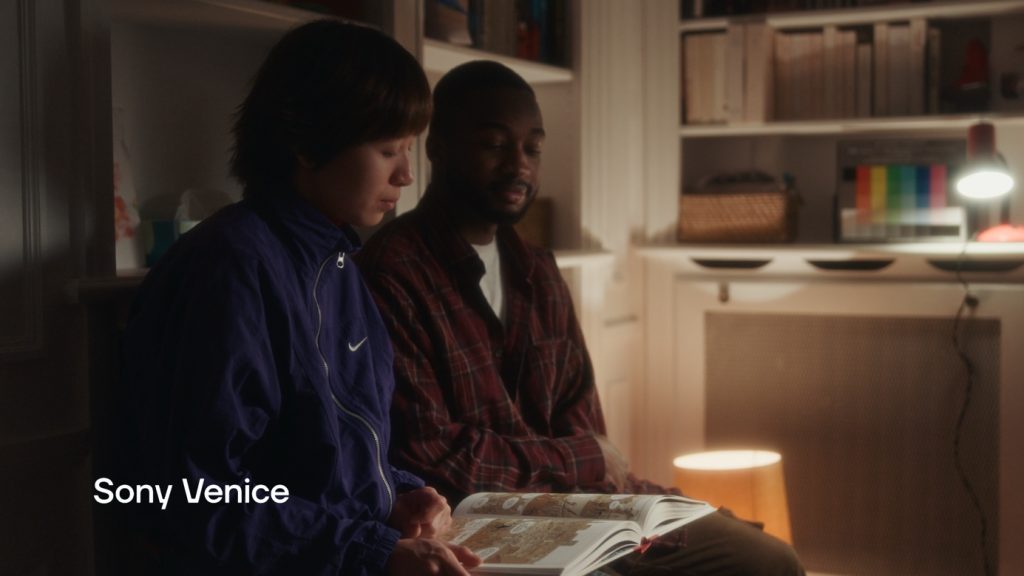
In the image above, shot with a Sony Venice, « A » is located on the specular reflection on the actor’s forehead, whose linear AP0 digital value is around 5, or 5 EV above neutral gray. Point B is located on the light source and has a value of 13.62, which is just over 6 EV above neutral gray. But this value is actually the maximum value recorded by the Venice: the source is clipped.
So the image shows a difference of 1 EV between point A and point B, but this is not true to the actual photometry of the scene; the source is probably several EV above, but this energy has not been recorded. So if we generate diffusion or halo from this image, the phenomenon will be too subtle on the lamp, and the amount of diffusion around the lamp compared to that around the forehead will not look quite natural.
This may still be acceptable, as we will still have a sense of diffusion, but if we want to improve this tool, we need to add the ability to boost the energy in the highlight to generate significantly more diffusion on the lamp than on the forehead.
That’s why we designed a highlight boost, which we recently perfected because the old one was prone to breaking the signal.
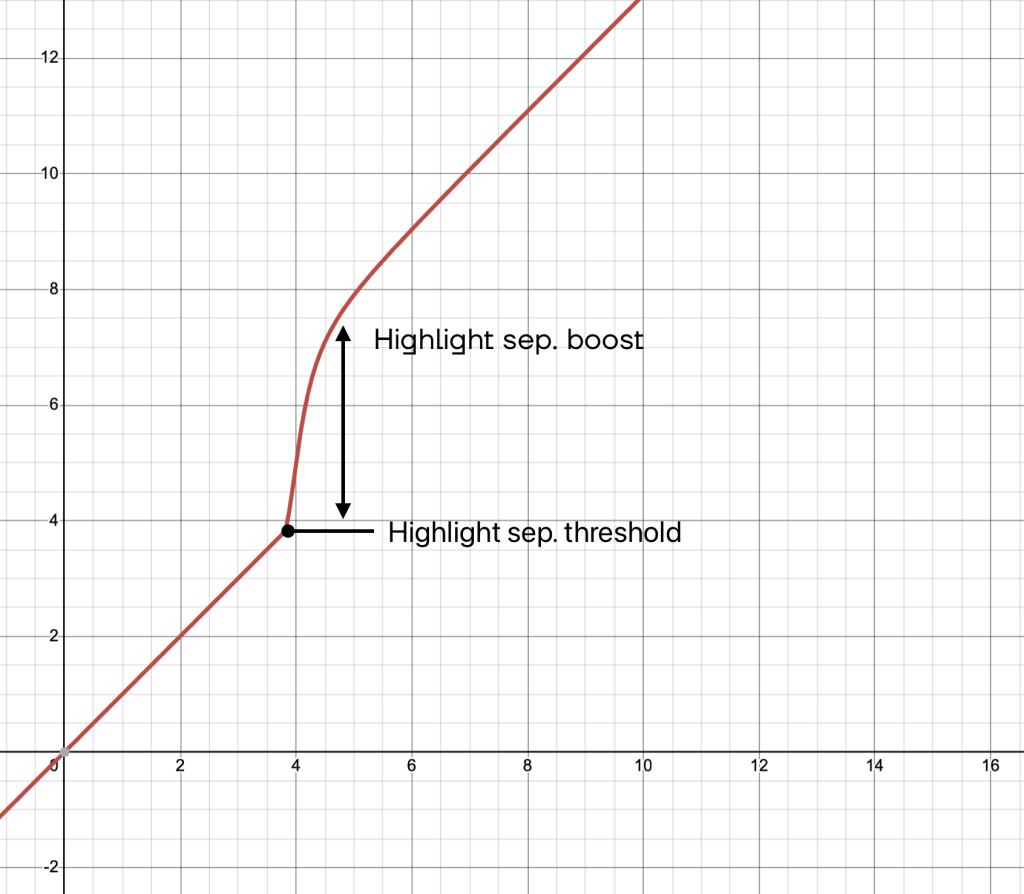
How to boost highlights ?
It involves boosting the signal from a certain threshold to increase the energy of the very high lights before applying the halo or diffusion, then applying the inverse of the boost to restore exposure of the original image, but with more pronounced diffusion on the highlights.
But why not a systematic and fixed highlight boost ?
Depending on the camera you use to produce your images, the dynamics in the highlights can be quite different, and so the numerical value and therefore the “energy” that will be used to create the desired effect can differ as well.
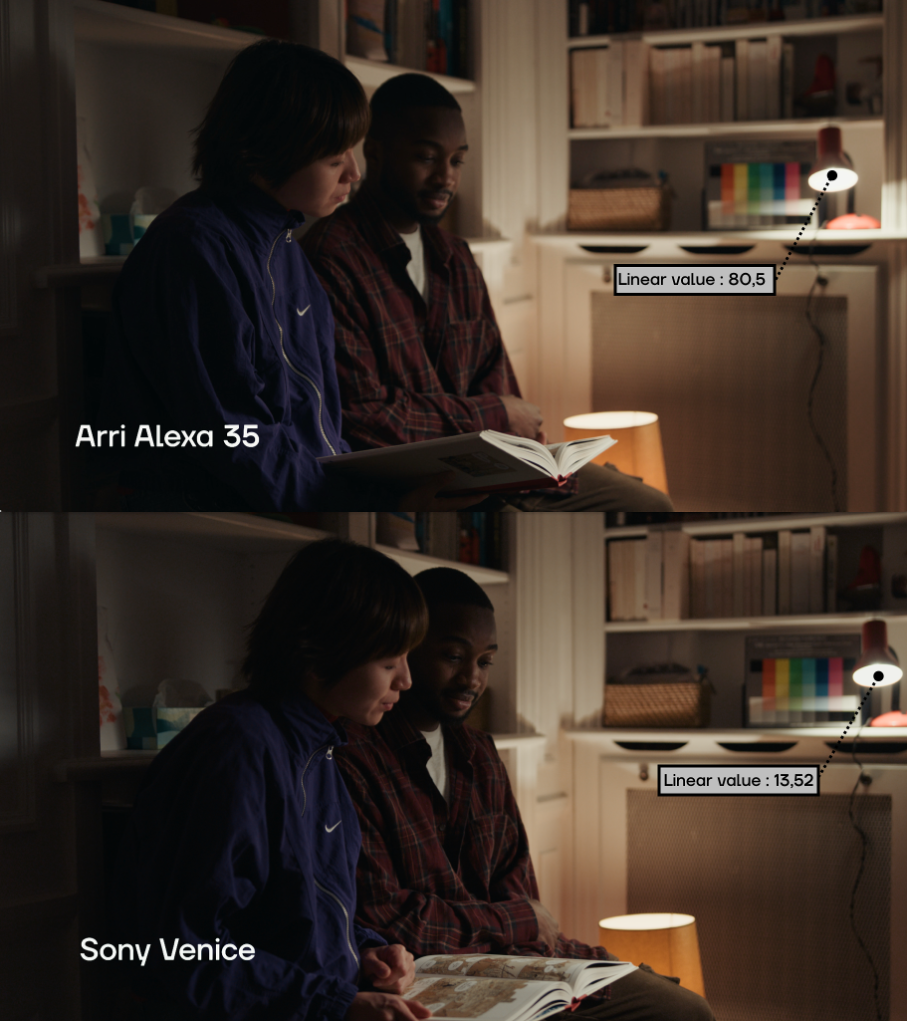
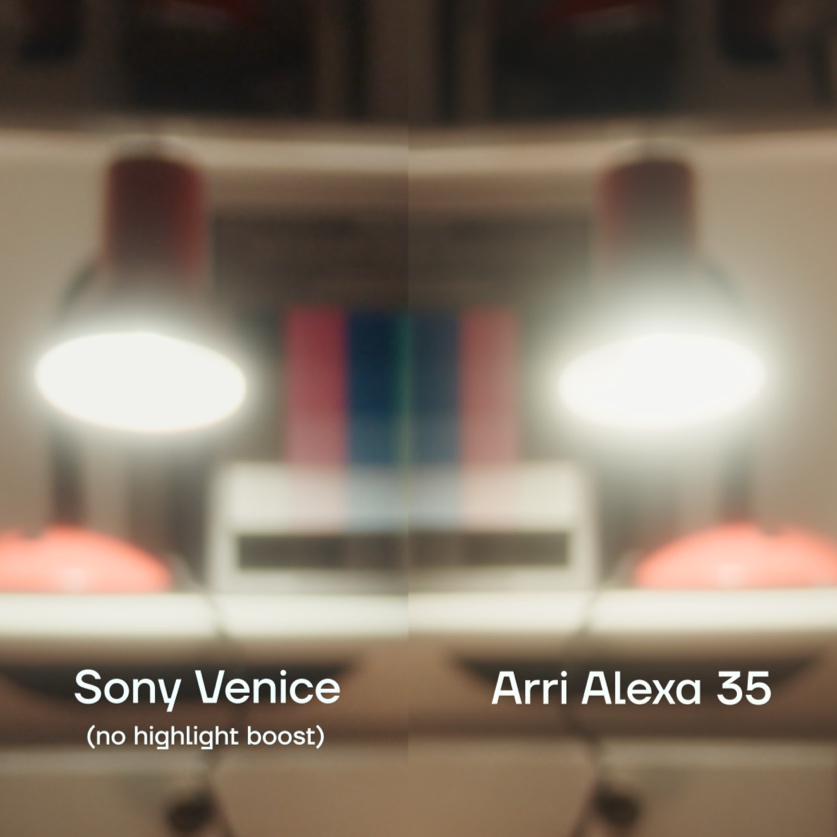
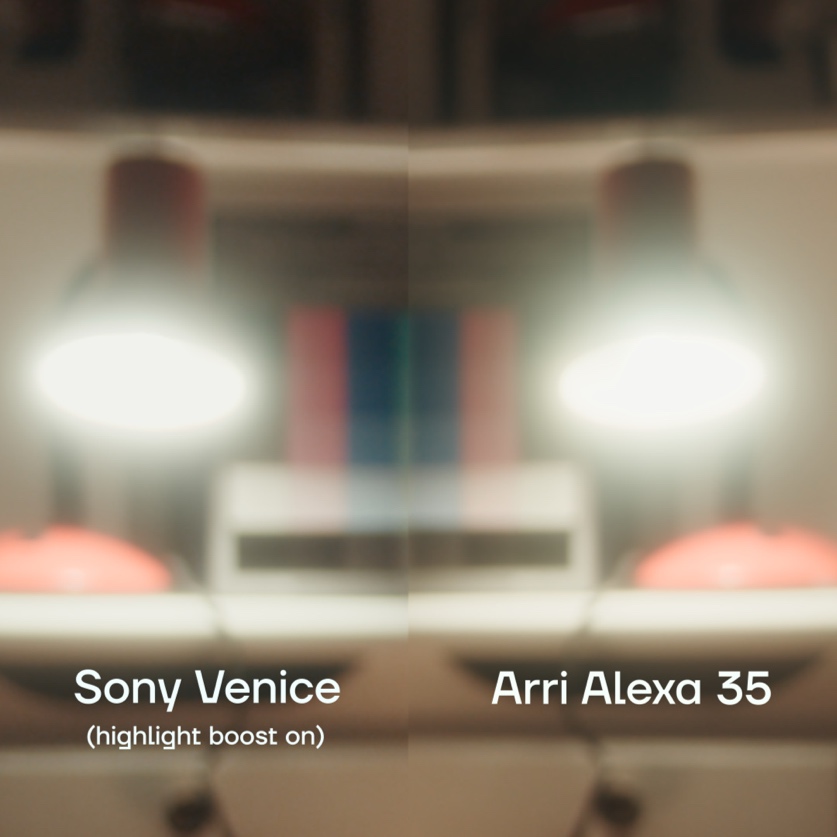
In the example above, in the same shot filmed in Venice and on Alexa 35, the significantly higher dynamic range of the Alexa 35 allows it to reproduce a much higher value for the center of the lamp. It should be noted that for a standard representation of the scene, this difference in dynamic range has no real aesthetic impact and is not even noticeable in the developed image.
However, this difference in the data input into Diaphanie will result in a significant difference in the diffusion generated, since the additional energy captured by the Alexa means a greater impact on diffusion. In this situation (and even in general), the Alexa is closer to the photometric reality of the scene, so the effect will be a little more convincing.
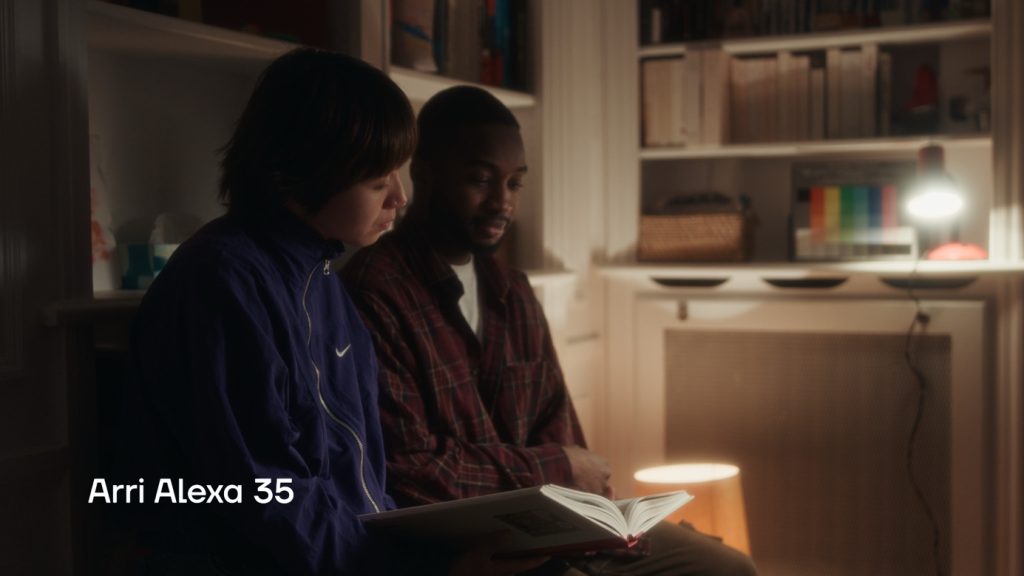
The diffusion is more pronounced on the lamp in the picture shot in Alexa, but a boost of the last EV recorded on the Venice can help to reinject the missing energy into the shot filmed in Venice.

So, depending on the camera you use, you will need to adjust these settings to some extent to extrapolate the highest values, which is why we have made them fully configurable.